3D Production instructions for Asset Management
Introduction
This part of documentation aims to provide guidance for production of 3D assets to help make the setting up the system most effective
Considerations
Contents of glTF and glb files
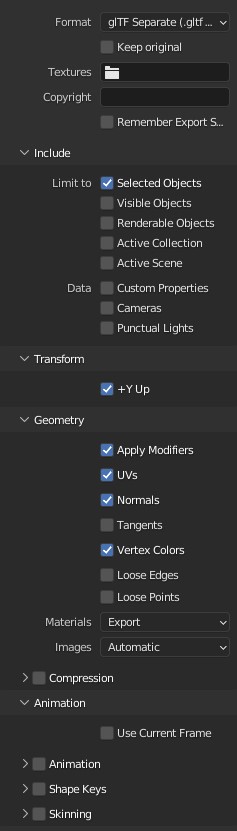
The glTF and glb files should only contain the mesh data and you should remove other scene objects like cameras and lights. Having these in the file will cause an error in runtime rendering, but import correctly in the manager. This can be achieved with 3D editors like Blender.org or 3DS MAX. Meshes must not have empty container meshes, but only real merged meshes of the part item that is shown. All internal and unrendered meshes should be removed as they have no use in visual rendering.
3D asset positioning
When developing 3d assets, consider the positioning of the assets in X, Y, Z dimensions and avoid having the faces of the objects in different directions. You can re-orient the objects in part's root properties configuration to align then 3D assets and manage their rotation, but orienting the objects properly during 3D asset generation time, saves a lot of time during the configuration development time.
Our recommendation is to position assets so that the "front" face of the object is facing the negative direction of Z axis. see Coordinate System for information of the 3D axis definitions. This aligns "left" and "right" on the X axis and "up" and "down" on the Y axis. It would be advisable for you to ensure all 3D objects follow the same convention.
3D asset origo placement and pivot point
The origo placement is important part of every 3D asset in defining the placement of the 3D mesh on the 3D scene initially and also regarding the pivoting of the part when not placed as a child under a configuration logic that corrects the attribute.
Our recommendation is to place the origo and the pivot point at the same place for similarily placed 3D assets and generally be on the bottom center of the 3D asset.
3D positioning of accessories of a part
When configuring accessories for the main part, one does not need to define alignment attributes for positioning the accessories if the accessories are aligned with the main part and exported with same origo settings as the main part.
As example, lets imagine we have a floor standing lamp where the lampshader is an accessory of the lamp. When exporting the 3D mesh for the lamp (lets call this lamp base) without the lampshader, we set the origo at the floor level, centered on the floor stand. When exporting the lampshaders, we position the lampshader appropriately on the lamp, but export only the shader as 3D mesh. Now when the 3D assets are imported to 3D product configurator the configuration of the logic becomes quite simple: the lamp base will be a part with an accessory slot for the shader as a child item and the shader will be a part as a child of the accessory slot. We do not need to make alignment changes to the accessory slot definition to position it differently in the 3D space as the lampshader GLTF already aligns perfectly with the lamp based on the export.
Our recommendation is to consider the origo placement of parts during 3D asset production for accessories that position only to one place in respect to the part it attaches to.
For parts that have multiple placements, like legs of stools and sofas and similar, we recommend that the part will set origo as the main part.
Material Areas
Material placement on a part is based on material area definition on the part and during the 3D asset production time, the 3D model need to define the direction of the normals on the vertices and definition of the mesh areas which define a specific material area.
Thumbnail images
For each 3D part and Texture and product item, a thumbnail Image asset is used to visually represent the item to the planner user. These thumbnails should confirm to the following specification:
- JPG or PNG format (JPG preferred)
- 1:1 image aspect ratio
- transparent image when the image does not cover the full space
- 64px x 64px size or multiple of that (we recommend 64px x 64px or 256px x 256px)
The 3D Product Configurator will automatically resize all thumbnail images to 64px x 64px, but as this process can be slow when done the 1st time, launching the planner will take time before opening. All the assets are cached in CDN and distributed within our CDN distribution network to reduce load times based on users locations and nearest CDN point-of-presence.
Naming
VividWorks 3D product configurator reads the GLTF metadata file for all definitions of material areas and when you configure Material Slot permits you to selecting one or more material areas for material configuration.
For the person doing the configuration of logic in the 3d product configurator, the naming conventions matter to identify the correct material area(-s) for the material slot to reduce trial-and-error.
Second, when reusing assets like materials accross different parts of the configurable product, the naming of material areas should follow same conventions for areas that are then same.
Our recommendation is to therefore
- name the material areas consistently across parts
- ensure capitalisation consistently across parts
- contain 'MAT' as text at the end of material area eg. "SeatBackMAT", "SeatMAT"
3D tool specific instructions
3DS MAX
Blender 3D
Link to blender.org
Follow the above instructions and guidance.
When exporting 3D assets, select each object separately and export with including only the selected object in the export and repeat the selection of the object and possibly adjusting the settings and exporting only that part of the model. This ensures that you do not have additional scene objects in the file other than the 3D mesh.