Material
Overview
Material represents a surface to be rendered on top of 3d mesh on the material area defined by the material slot. Material definition affects visual quality the most and is therefore one of the cornerstones of configuration to the perfection. Almost every parameter that you can configure directly affects how the product looks visually.
To add a material, select "Material" from the contextual menu for Part or Item List. 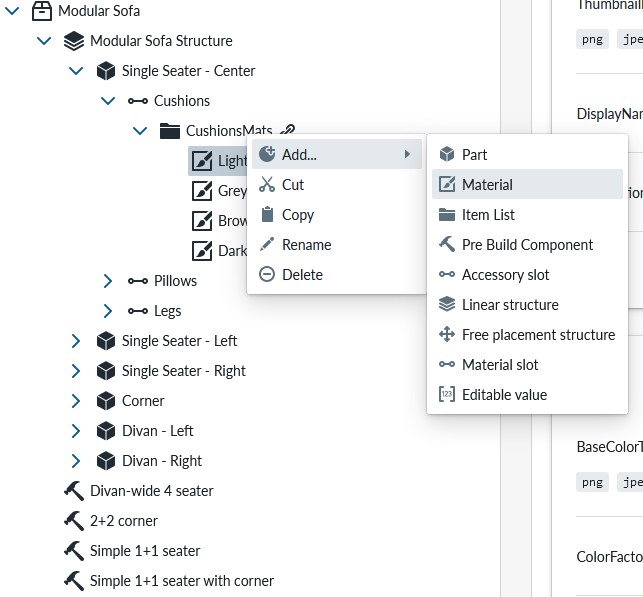
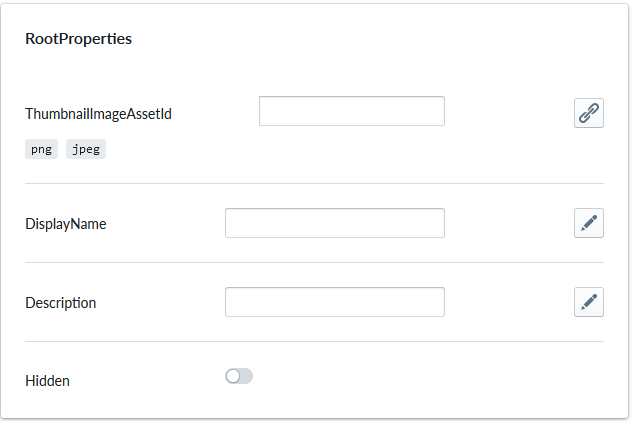
Root Properties cover the thumbnail picture, naming and description of the material to be shown on the planner view. The PBR Propertyset covers surface definition and the TilingTexture property set from the optional propertysets are commonly used for defining the surface.
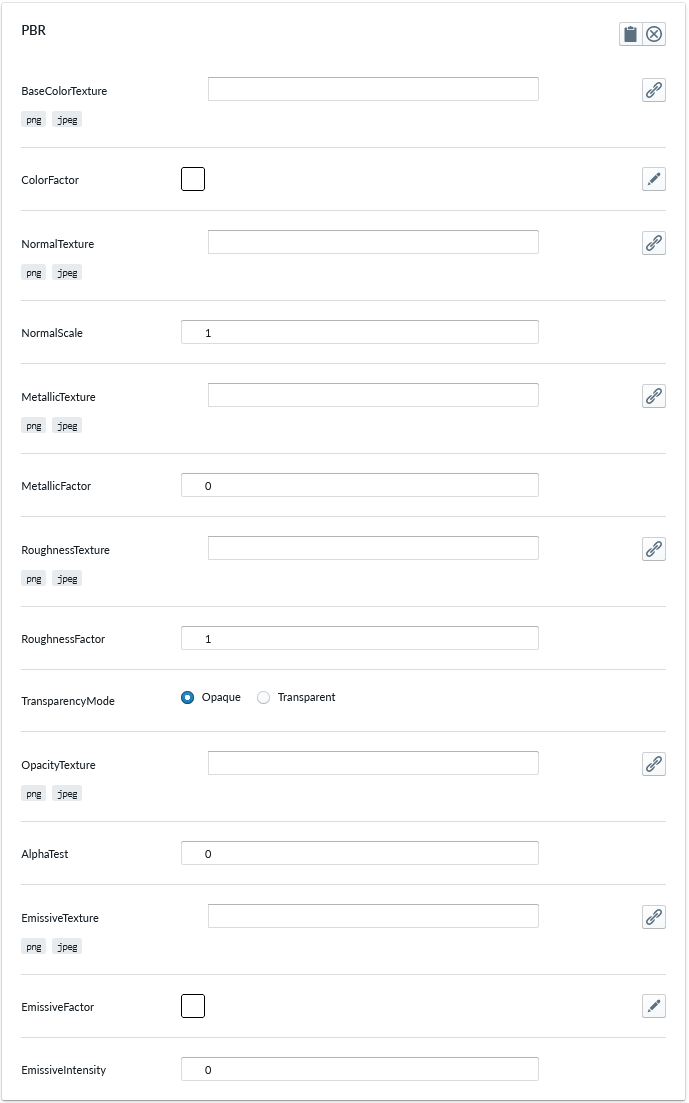
PBR Properties cover the look and feel of the material itself. These parameter define how Physically Based Rendering gets applied and affect how the surface looks. The Materials cover examples of the parameters and how the output look.
Base properties
RootProperties
| Property Name | Type | Localized | Description |
|---|---|---|---|
| ThumbnailImageAssetId | PNG/JPEG Asset | N | An image thumbnail to show to the buyer on the planner, ideally 256x256 pixels |
| DisplayName | Text field | Y | The name to show on the planner for this material |
| Description | TextField | Y | The description to show on the planner for this material |
| Hidden | Toggle | N | Is the material visible or not? |
PBR (Physically Based Rendering)
PBR - This property set handles physically based rendering properties.
| Property Name | Type | Localized | Description |
|---|---|---|---|
| BaseColorTexture | PNG/JPG Asset | N | The base texture file for the item selection which can be applied onto the item as material, texture files should be square and multiples of 512x512 pixels |
| ColorFactor | RGB Color | N | Color from colorpicker, leave empty when selecting the color from the BaseColorTexture or tint the base color with this additional color as overlay |
| NormalTexture | PNG/JPEG Asset | N | The texture to create a normal map. The RGB values affect the surface normal for each pixel fragment and change the way the color is lit. Normal maps do not change the actual shape of the surface, only the lighting. The encoding must follow right-hand rule |
| NormalScale | Number | N | How much the normal map affects the material. Typical ranges are 0-1 |
| MetallicTexture | PNG/JPEG Asset | N | File where the blue channel of this texture is used to alter the metalness of the material. Leave empty for non-metallic surfaces. A texture file for metallic surfaces |
| MetallicFactor | Number | N | How much the material is like a metal. If MetallicTexture is also provided, the values get multiplied with each other. Default is 0. Use 0 for non-metallic materials like wood or stone, Use 1.0 for metals. A value between 0.0 and 1.0 could be used for a rusty metal look. |
| RoughnessTexture | PNG/JPEG Asset | N | File where the green channel of this texture is used to alter the roughness of the material. This forms small bumps and alterations based on the map into the texture making the surface look uneven. Useful for fabrics and cloths |
| RoughnessFactor | Number | N | How rough the material appears. 0 means a smooth mirror reflection, 1 means fully diffuse. Default is 1. If RoughnessTexture is also provided, the values are multiplied |
| TransparencyMode | Radio Button | N | |
| OpacityTexture | PNG/JPEG Asset | N | File where ... is describing the opaqueness of the surface |
| AlphaTest | Number | N | Sets the alpha value to be used when running an alpha test. The material will not be rendered if the opacity is lower than this value. |
| EmissiveTexture | PNG/JPEG Asset | N | Set emisssive (glow) map. The emissive map color is modulated by the emissive color and the emissive intensity. If you have an emissive map, be sure to set the emissive color to something other than black. |
| EmissiveFactor | RGB Color | N | Emissive (light) color of the material, essentially a solid color unaffected by other lighting. Default is white. Choose a color from color picker |
| EmissiveIntensity | Number | N | Intensity of the emissive light. Modulates the emissive color. |
Optional property sets
TilingTexture
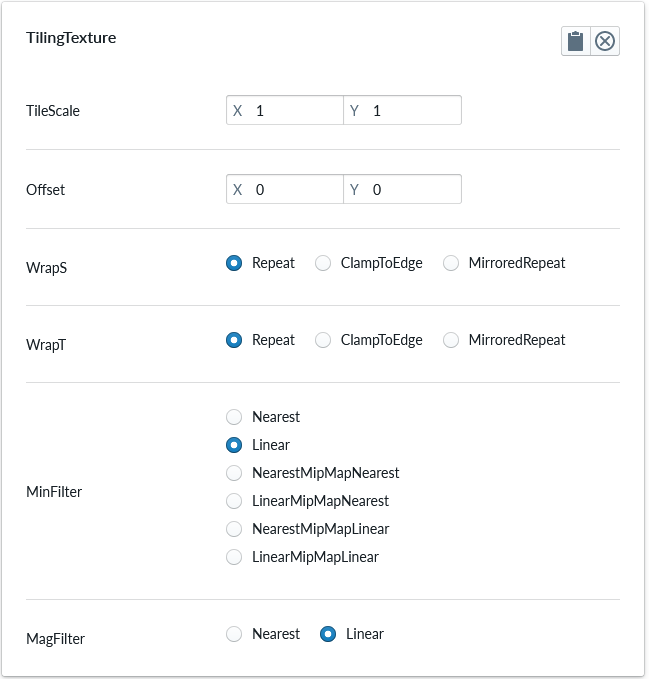
Tiling Texture property set affects how the texture is tiled over the 3d mesh. This is important when thinking that the textures do not have to and typically do not, cover the mesh surface area without being stretched over the surface, thus making really bad visual outlook.
Additionally the filter values affect og Magnification (MagFilter) and zoom out (Minification) affect tiling and optimizing how pixels are converted when zooming in or zooming out. These affect visual quality of the rendering and depending on the surfaces needed, might have to be adjusted
| Property Name | Type | Localized | Description |
|---|---|---|---|
| TileScale | Vector(2) | N | The number of repeats (when necessary) to do to scale the texture. |
| Offset | Vector(2) | N | How much a single repetition of the texture is offset from the beginning, in each direction U(X) and V(Y). Typical range is 0.0 to 1.0. |
| WrapS | Radio Button | N | This defines how the texture is wrapped horizontally and corresponds to U in UV mapping. The default is ClampToEdgeWrapping, where the edge is clamped to the outer edge texels. The other two choices are RepeatWrapping and MirroredRepeatWrapping. See the texture constants in Materials |
| WrapT | Radio Button | N | This defines how the texture is wrapped vertically and corresponds to V in UV mapping. The same choices are available as for .wrapS |
| MinFilter | Radio Button | N | How the texture is sampled when a texel covers less than one pixel. The default is LinearMipmapLinear, which uses mipmapping and a trilinear filter. See MinFilter constants in Materials for more details of the choices. |
| MagFilter | Radio Button | N | How the texture is sampled when a texel covers more than one pixel. The default is LinearFilter, which takes the four closest texels and bilinearly interpolates among them. The other option is NearestFilter, which uses the value of the closest texel. See the Mag Filter constants in Materials for more details of the choices. |
SalesCodeMapping
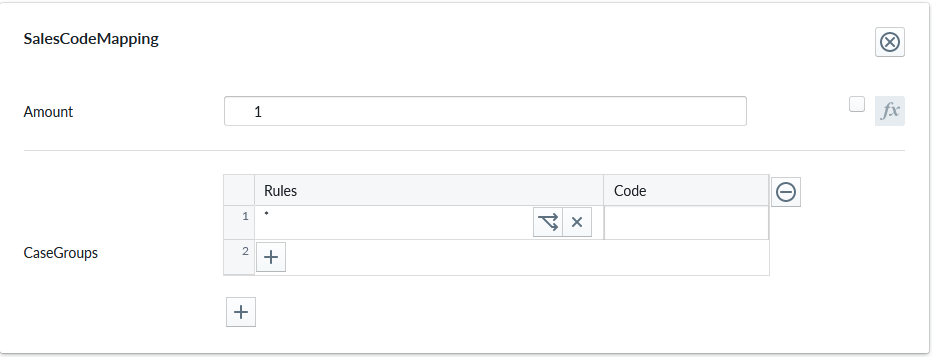
SalesCodeMapping property set is used to define the logic to determining SKU (Stock-Keeping Unit) codes used for integrations and Summary. When integrating the 3D ecommerce configurator with eCommerce platforms, both must explicitly know the same set of SKUs in order for the configurator to be able to show proper prices and map the composition configuration to an order (Add To Cart)
| Property Name | Type | Localized | Description |
|---|---|---|---|
| Measurand | Radio Button | N | The unit type of the Amount: Count, Length, Area, Volume, Weight, Time |
| Amount | Scripting | N | The defaul number of units each item where this property is defined will be counted, typically 1, but occasionally something else based on logic |
| Tags | String List | N | Tags that categorize this sales code mapping. Defaults to a single tag ("Common") |
| CaseGroups | Logic Fields | N | For each logic group, a selection of case split logic rules in the rule field that define an outcome code into the code field. * denotes applies to all definition A case-split can be based on scripting logic, a child condition (eg. material slot or accessory slot selection), Multiple case groups perform an composed SKU code. Refer to Sales Code Mapping for more information |
The Measurand specify what kind of a measurement is the Amount... It can be a number of element (Count) or measurements (Length, Area, Volume, Weight, Time ). In case of measurements the entered value is in standard unit system in meters. In the shown example 1.5 for Measurand=Area, it means 1.5 square meters. these will be shown on the planner according to the selected unit system. For example if the selected unit system is cm, then the displayed value is 15000 square cm. The conversion will be done also in imperial measures.
Tags are free-form, case-insensitive strings used to enable or disable this mapping at runtime based on the selection per site. The Tags can be enabled for each site.
There is a list there (In "Site Configuration" > "Product Catalog" > "Tags" (from the "..." context menu) of all tags found in all SalesCodeMappings from product or part level recursively.
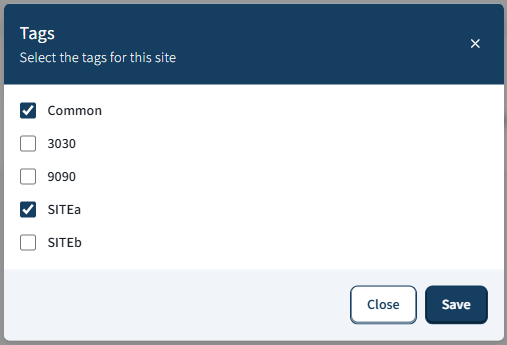
On publishing only the SalesCodeMappings with enabled Tags, will be taken into account.
Tags behavior:
- Comparison is case-insensitive (OrdinalIgnoreCase).
- Duplicates should be avoided; only one matching tag is required to enable the mapping.
- Back-compat: legacy data without tags is initialized to the default "Common" tag.
Tags examples:
- ["Online", "B2B"] enables this mapping when either "online" or "b2b" is enabled at runtime.
- ["Common"] (default) keeps the mapping generally available unless a stricter tag set is enforced.
For admin users there is a way to edit the skus in an external text file and import it back.
Parts and Products have two extra context menus, exportSKUs and importSKUs:
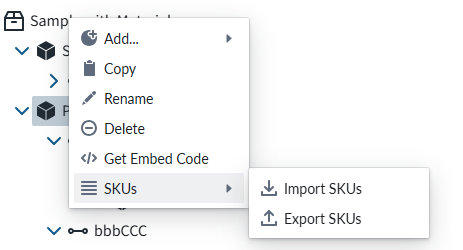
This is usefull especially in the case that there are hundreds of entries. Editing those one by one would be practically impossible.
CustomProperties
Custom Property set (or sets) allow definition of logic that defines something that otherwise is not predefined in the system logic.

| Property Name | Type | Localized | Description |
|---|---|---|---|
| Name | Text field | Y | The name of the custom property. It can be referred to in scripting from elsewhere |
| Value | Scripting | N | Value or scripting logic that the property has |
ValidationRule
Validation rule property set is used to define logic that can be useful to ensuring the item where the validation rule is will follow define rules.

| Property Name | Type | Localized | Description |
|---|---|---|---|
| DisplayMessage | Text Field | Y | Text that is shown on the Planner when the conditions of the rule are true |
| Level | Radio Button | N | Selection should the rule show error, suggestion or indicating something is missing |
| Trigger | Scripting | N | The logic that defines the validation rule |
Note
Validation rule level states correspond the next error levels. Error => "Error" Missing Selection => "Warning" Suggestion => "Info"
If the "add to cart" button is available, in case we have an error, the add to cart button will be disabled and not clickable until the error is fixed.
ClassificationTag
Classification tag allows the configurator to define a name in the system that can be referred to in other logic components through the scripting system

| Property Name | Type | Localized | Description |
|---|---|---|---|
| Tag | Text field | N | A label that is associated with the item it's been configured to |
IntegrationData
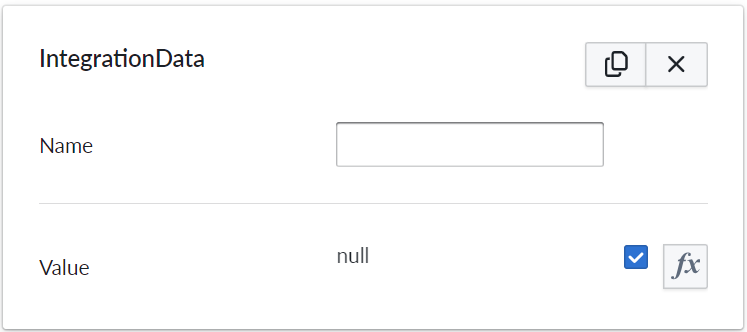
Integration data property set is used to add metadata to product parts and / or materials.
| Property Name | Type | Localized | Description |
|---|---|---|---|
| Name | Text field | Y | The name of the integration data property. It can be referred to in scripting from elsewhere |
| Value | Scripting | N | Value or scripting logic that the property has |
Example of how this might look in the SalesData json:
     "properties": {
        "Material": "Fabric Petrol"
     },
Originally our product summary / Bill of Materials(BOM) has listed and counted items(parts of the composition) based on SKU's. When using integration data, the list takes the provided metadata into account while summarizing items.
This change means that parts with identical SKU's but different integration data (colors or materials specified) are treated as separate items in the summary / BOM.
Example of usage
Some e-commerce platforms have product variant limits, which hinders stores that have a vast variety of colors and materials. Using integration data property set in manager (management.vividworks.com), material and color options can be put to product parts metadata.
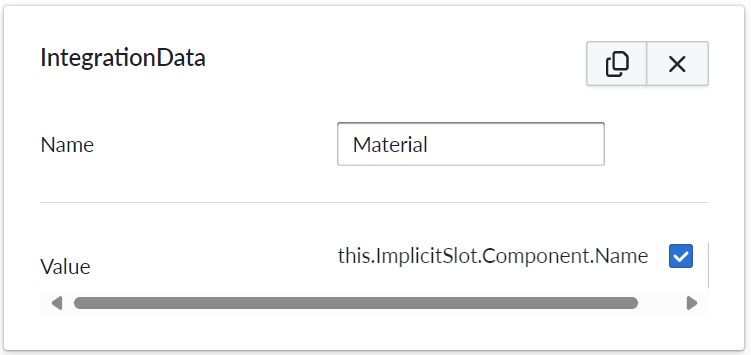
This removes the need for putting SKU's for materials, thus also removing the issue of product variant limit.
How above example would work and look in Shopify
In Shopify, the visibility of data can be configured with two options:
The data can be displayed to both the shop owner and to the customer. It would be visible in cart and checkout (and for shop owner only, in 'orders' tab in Shopify admin view.) This can be implemented using Shopify's cart line item properties.
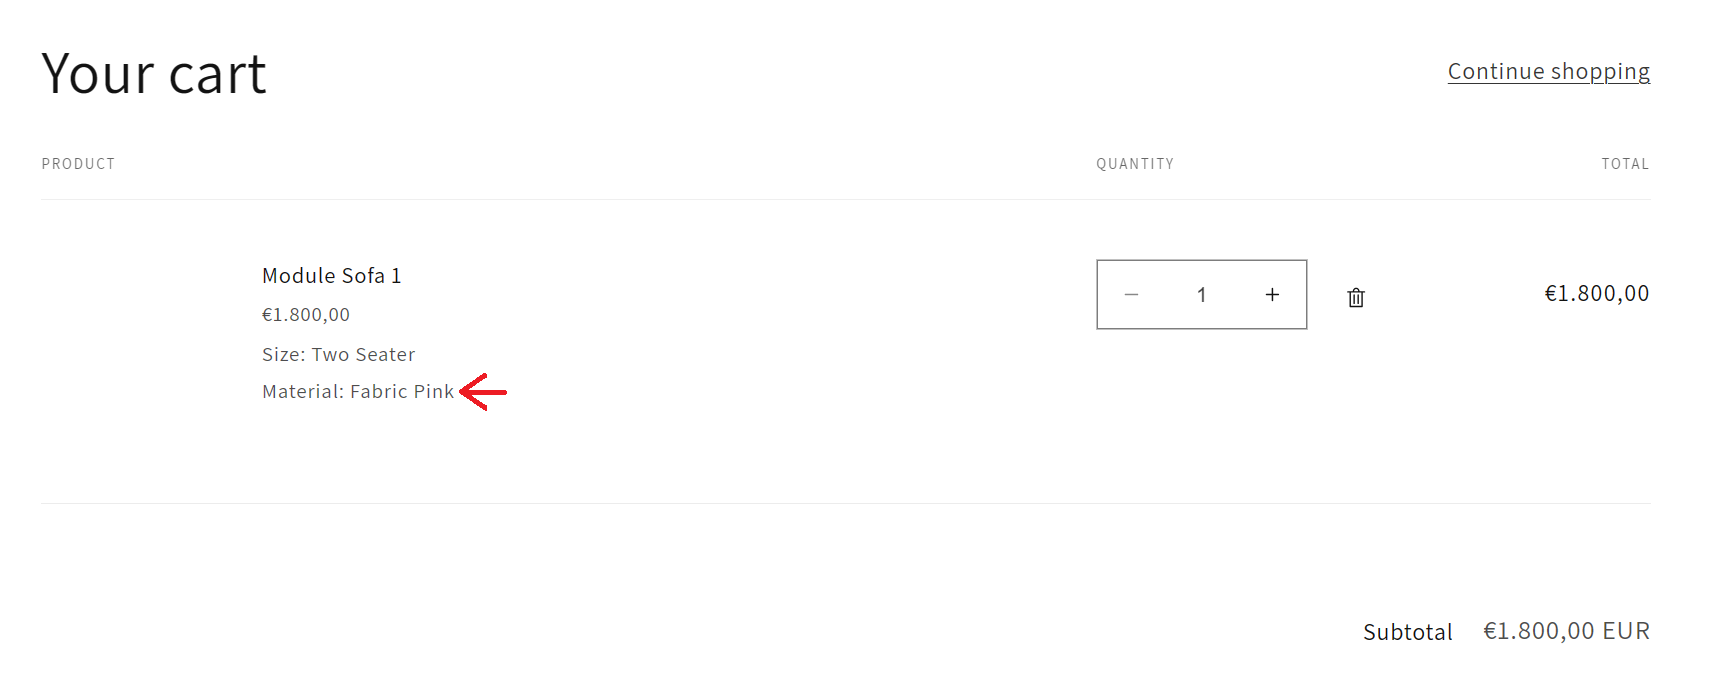
Red arrow in above image shows the result of configuring integrationdata in the way of the example.
Red arrow in above image shows the result of configuring integrationdata in the way of the example.
Red arrow in above image shows the result of configuring integrationdata in the way of the example.The data can be set to display only to the shop owner, in 'orders' tab in Shopify admin view. This can be implemented using Shopify's cart line item hidden properties. This way, the end customer will not see the metadata at all.

Red arrow in above image shows the result of configuring integrationdata in the way of the example.
Conditional Availability
Conditional availability is used to dynamically enable or disable possible selection for a slot. This works with both material and accessory slots. If the available script evaluates to false, the selection is not shown in the menu.
Part or material can also became unavailable after it has already been added to the product composition. In this situation, the unavailable part is automatically replaced with an allowed one. The replacement setting can be used to configure which option is used. Multiple replacements can be chained, in which case the first allowed replacement is chosen. If a valid replacement is not found this way, the slot is either cleared or replacement is chosen in the order of options in the tree.
Slots that have MustBeConnected enabled should be configured in a way that they always have at least one allowed option.
![PROPERTY_SET: ConditionalAvailability]
| Property Name | Type | Description |
|---|---|---|
| Available | true/false | A scripted condition which determines if this part or material is currently available. |
| Replacement | Option | If this part or material becomes unavailable after it has been added, it is replaced by this selection. |
Notes
Tiling of images in textures only functions if image dimensions are powers of two (2, 4, 8, 16, 32, 64, 128, 256, 512, 1024, 2048, ...) in terms of pixels. Individual dimensions need not be equal, but each must be a power of two. This is a limitation of WebGL.